Now that we have wrapped up the Arch Linux installation series, it's time to choose a window manager. While we could simply install a traditional Desktop Environment (DE) like KDE or GNOME, we have came too far for that! Instead, let's look at two modern Wayland-based options: COSMIC and Hyprland.
COSMIC is fairly simple to install, so I'll cover the essentials here. Refer to the COSMIC Wiki for further details. Hyprland, in contrast, requires significantly more configuration, making the Hyprland Wiki an essential reference. You can access my personal dotfiles on Github if you would like to follow along or adapt them for your own setup.
COSMIC
COSMIC is a desktop environment built by System76 and written in Rust. In September 2025, the 24.04 Beta was released. It features a custom theming system, uses the Rust-based Iced graphics toolkit, and delivers a snappy, tiling-focused environment with several preloaded applications.
For my setup, I went with a bare-bones environment. If you prefer the full COSMIC experience (text editor,file manager, cosmic-terminal, a multimedia player, wallpapers, etc.), install using sudo pacman -S cosmic. Instead, I opted for a minimal configuration and used Alacritty as my terminal.
sudo pacman -S cosmic-session cosmic-comp cosmic-panel cosmic-applets cosmic-app-library cosmic-bg cosmic-randr xdg-desktop-portal-cosmic alacritty
COSMIC Initialization
Launching COSMIC from the TTY is straightforward via start-cosmic. I chose to stick with the TTY for simplicity, but if you prefer a graphical login screen, your can download and enable the cosmic-greeter.
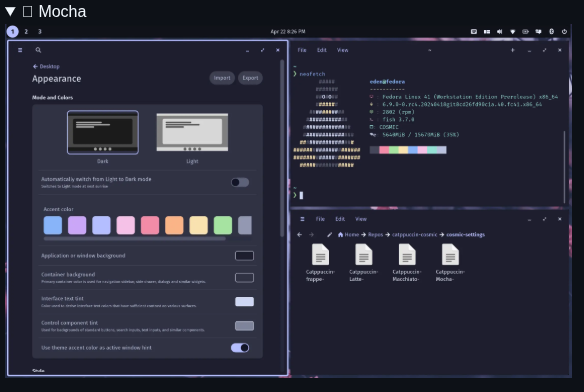
Exploring COSMIC
Right away, you will notice how smooth and responsive COSMIC is. The tiling experience is fluid, and customization is straightforward — wallpapers, themes, menu bar, icons, etc. However, I found myself using the touchpad more than I prefer. This was actually my second attempt at trying COSMIC. While it's polished and thoughtfully designed, I am just too accustomed to Hyprland. Still COSMIC is absolutely worth trying! If you want a refined, out-of-the-box tiling experience, COSMIC is a strong contender. The catppuccin theme, in particular, is definitely eye candy!! Meow!
It's also worth noting that COSMIC and Hyprland can coexist on your Arch system. You can launch either DE from the TTY, and each session runs independently without affecting the other.
Uninstalling COSMIC
If you're ready to move on to Hyprland, uninstalling COSMIC is straightforward. Don't worry, the Arch Linux installation remains untouched. To avoid dependency errors, certain blocking packages must be removed first. Otherwise, you will encounter dependency resolution failures, such as error: failed to prepare transaction (could not satisfy dependencies). Afterward, you can remove the remaining packages and clear the configuration directories for a clean slate.
# Remove the blocking packages
sudo pacman -Rns cosmic-screenshot cosmic-session xdg-desktop-portal-cosmic

# Remove remaining packages and clean configs
sudo pacman -Rns cosmic-comp cosmic-panel cosmic-applets cosmic-app-library cosmic-bg cosmic-randr
rm -rf ~/.config/com.system76*
rm -rf ~/.local/share/com.system76*
Hyprland
Installing Hyprland is more tedious than COSMIC, but the trade-off is complete customization and granula control. There is a learning curve, but it's well worth the effort. One key lesson from this project was the importance of having a mono nerd font installed before launching Hyprland. Without it, the terminal and keybindings will not function, leaving only SUPER + M working. Save yourself the major headache by installing a font first, for example: sudo pacman -S ttf-jetbrains-mono-nerd.
Next, install Hyprland using sudo pacman -S hyprland. Then launch it from the TTY using hyprland. If you see the Hyprland logo or the anime wallpaper, you have succceeded! A warning splash appears at the top on first launch. Using the default keybind to open the terminal, SUPER + Q, navigate to ~/.config/hypr/hyprland.conf and delete the line autogenerated=1. The config reloads instantly on save and the warning splash disappears immediately.
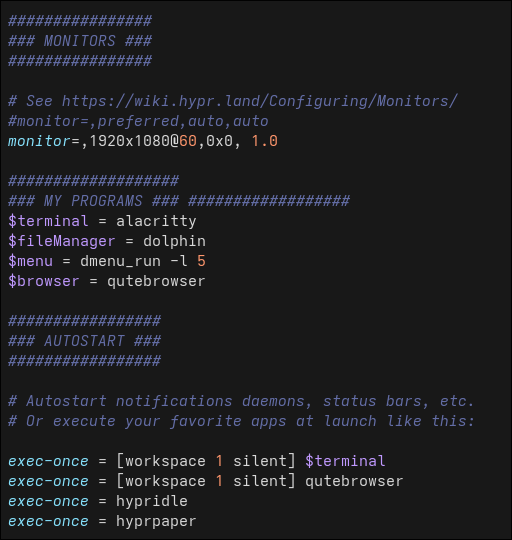
The SUPER key refers to the 'Windows' key. If you are unable to open the terminal, it's likely that the default terminal emulator wasn't installed. In that case, press SUPER + M to return to the TTY, and verify your terminal settings and keybinds in ~/.config/hypr/hyprland.conf. Verify that your desired terminal emulator is set correctly, whether Alacritty or Kitty.
# Set programs that you use
$terminal = alacritty
$fileManager = dolphin
$menu = dmenu_run -l 5
$browser = qutebrowser
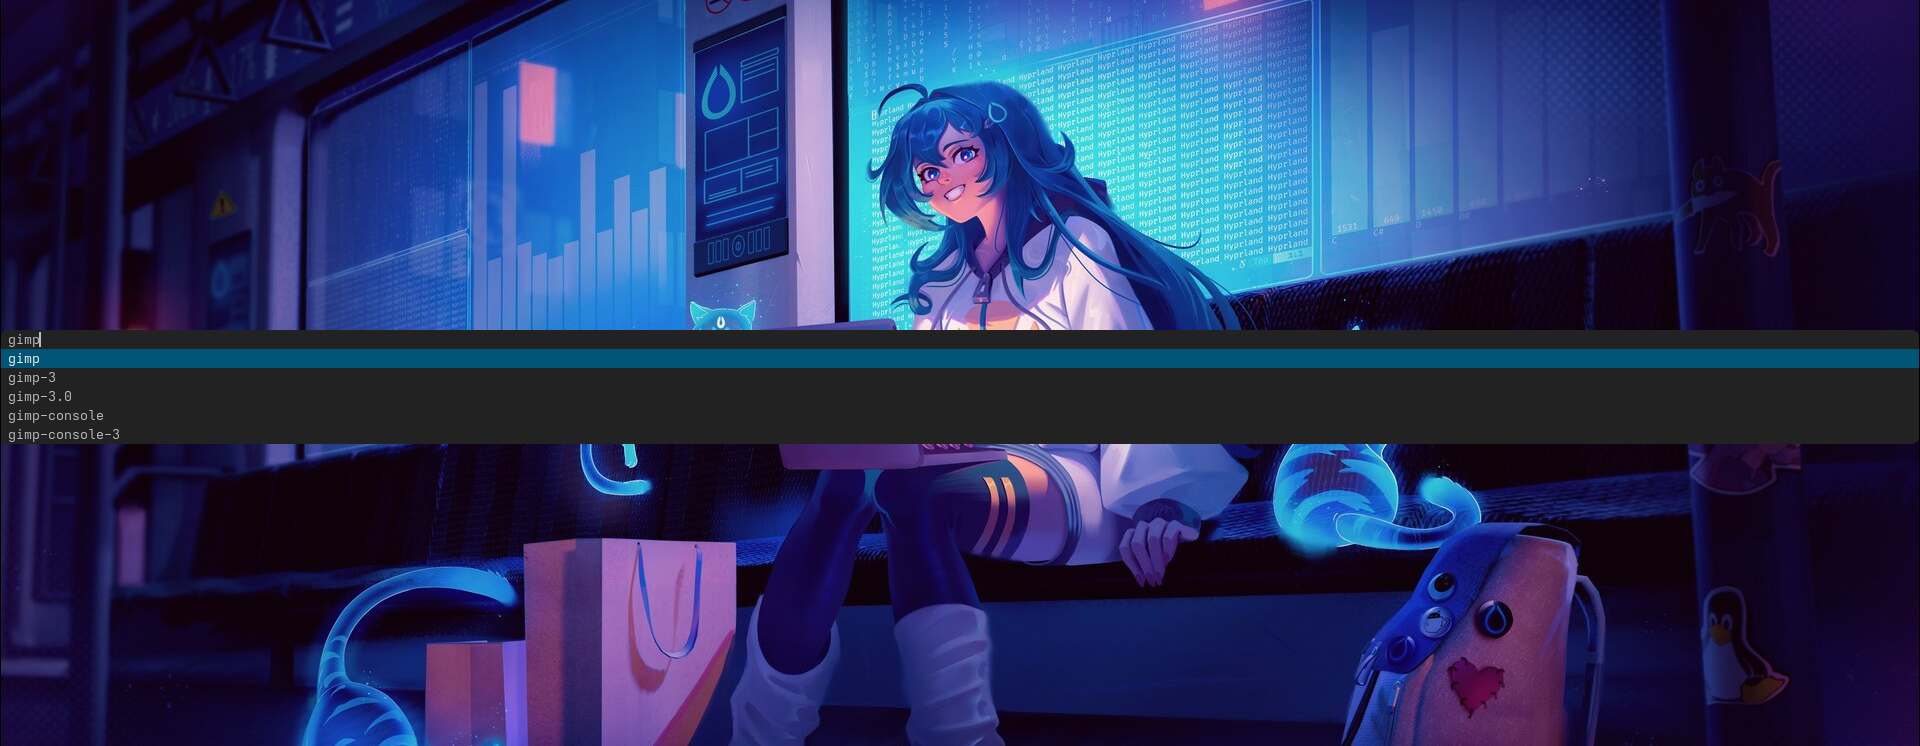
dmenu
Every window manager needs an application launcher. While Rofi is a popular choice, I'm going to experiment with dmenu for its minimalism. Created by the suckless.org project, it can be installed with sudo pacman -S dmenu. In the "My Programs" section of hyprland.conf, dmenu displays a vertical list of five entries, using dmenu_run -l 5. To swith to a horizontal layout, remove the -l option. I will cover dmenu scripting in a future post.
Monitor & Keybindings
Before customizing keybinds, it's important to confirm that your monitor is configured correctly. I adjusted my monitor resolution and scaling to monitor=,1920x1080@60,0x0, 1.0, but your setup may require some experimentation. Scaling changes can affect font rendering, so even though we installed the JetBrains Mono Nerd font earlier, additional adjustments may be neccessary. Here is my Alacritty configuratione for reference, located at config/alacritty/alacritty.toml. Exit the terminal and reopen to apply the changes.
Keybindings should be tailored to your workflow. I also configure several utilities and applications to launch automatically at startup. You can even select which workspace to open in. I prefer:
- SUPER + Enter for the terminal
- SUPER + B for the the browser
- Vim keys for navigation: h, j, k, l
Transparency and Borders
A small amount of transparency can add a surprising amount of visual polish. Even a subtle border provides just enough contrast to clearly seperate windows, via border_size= 1.
# LOOK AND FEEL -- decoration
active_opacity = 1.0
inactive_opacity = 0.8
hypridle
Hyprland has the Hypr Ecosystem, which are native utilities to simplify configuration. First, we'll manage the idle daemon, hypridle. This utility manages idle behavior by defining listeners that trigger actions after a set of period of inactivity. For instance, you can create a listener to auto-lock after a 5 minute delay. Install hypridle with sudo pacman -Syu hypridle. Create your config at ~/.config/hypr.hypridle.conf. The hypridle wiki provides a list of general variables and listeners for desired behaviors. To run hypridle at startup, edit hyprland.conf and add the command, exec-once = hypridle.
# hypridle.conf
listener {
   timeout = 300
   on-timeout = hyprlock
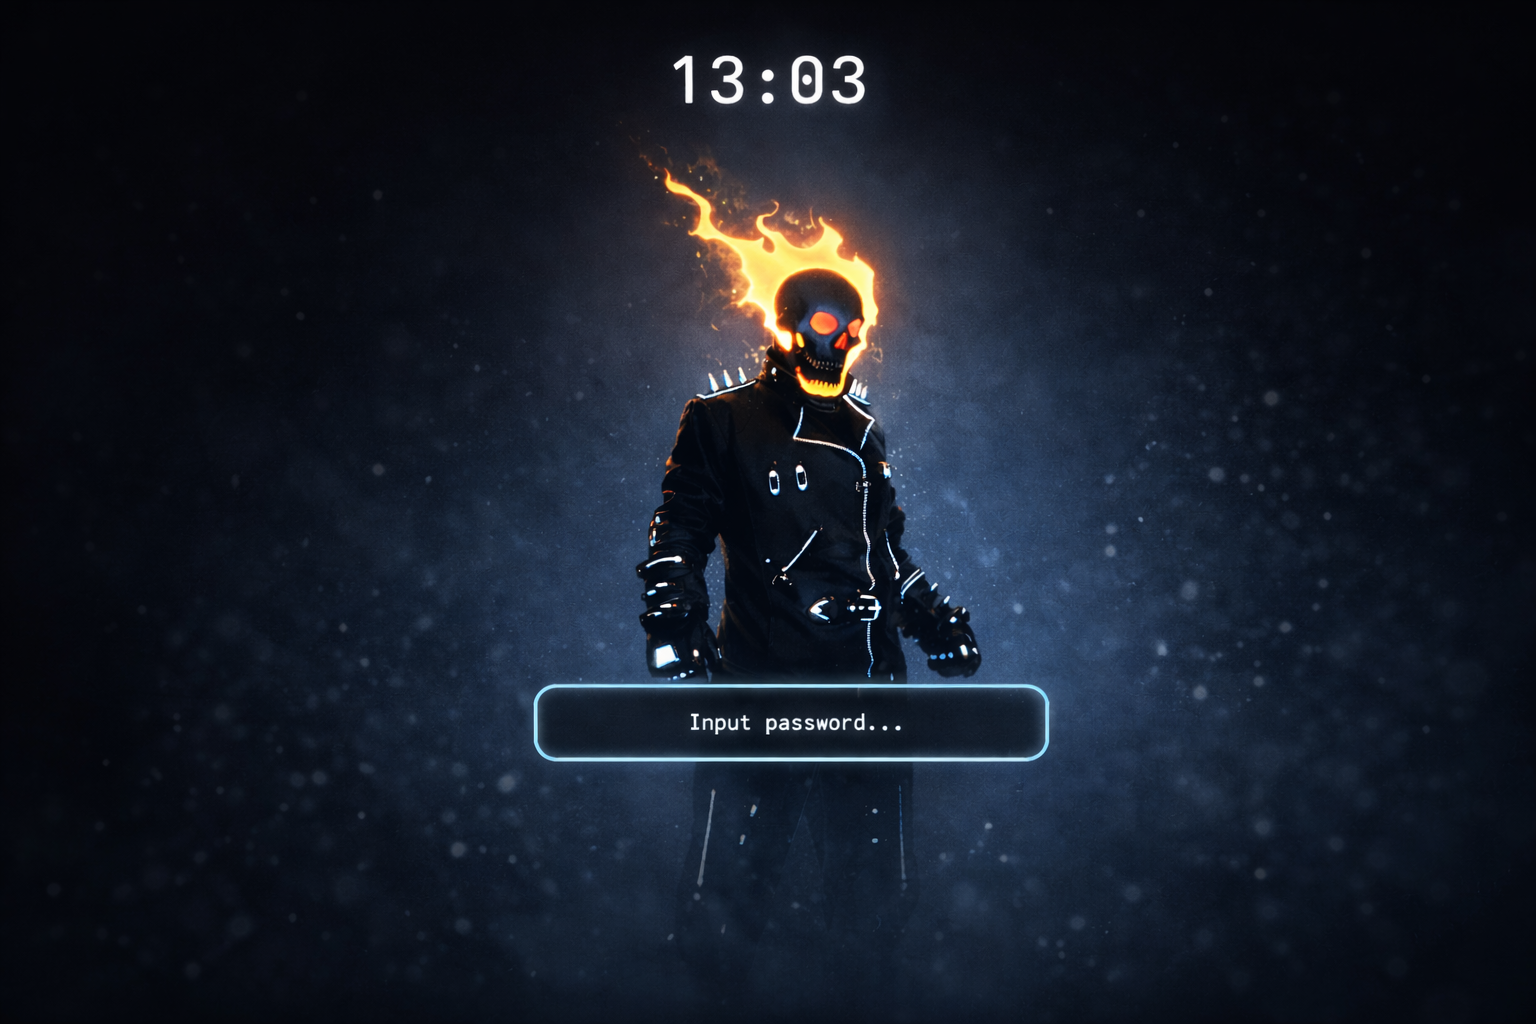
hyprlock
Next, we configure the screen locking utility, hyprlock. It integrates seamlessly with hypridle and allows for visual customization. Install it by performing sudo pacman -Syu hyprlock. Click here for a sample hyprlock.conf. You can experiment with changes in real time by triggering the lock keybind, CTRL + SHIFT + L. This custom keybind must be defined in hyprland.conf and must be launched at startup, bind = $CTRL_SHIFT, l, exec, hyprlock. Be aware that hide_cursor= true will result in a completely black screen. The lock is still active, but no visual feedback is shown when typing your password.
hyprpaper
Wallpaper management is handled by hyprpaper. Install the utility by performing sudo pacman -S hyprpaper. A hyprpaper configuration includes preload and wallpaper entries. Preloading loads the images to the RAM. To configure wallpapers correctly, you will need to find the name of your monitor, via hyprctl monitors. For example, my monitor's name is edP-1. An optional splash screen can also be displayed at the bottom of the wallpaper.
# hyprctl monitors
hyprctlMonitor eDP-1(ID 0):

preload= ~/pictures/wallpapers/dark_sun.jpeg
wallpaper= eDP-1, ~/pictures/wallpapers/flame.jpg
splash= true
hyprshot
Finally, hyprshot provides screenshot functionality. Install hyprshot using yay -S hyprshot. No configuration file is required, only keybinds. I have setup my bindings for three modes only, but refer to hyprshot -h for a full overview.
#hyprshot
bind = $mainMod, PRINT, exec, hyprshot -m window     #screnshot a window
bind = $CTRL_SHIFT, PRINT, exec, hyprshot -m output  #screenshot a monitor
bind = , PRINT, exec, hyprshot -m region             #screnshot a region
We have covered the fundamentals of minimal "ricing" on Linux. There are endless guides, dotfiles, and inspirations available, but understanding the fundamentals puts you in control of your system. You become your own administrator. If you are seeking a faster starting point or some inspiration, preconfigured setups are available, such as Omarchy, Hyde, end_4, JaKooLit, and ML4W.
Your configuration will evolve as your workflow does, but you’re firmly in control. You know what is running, why it is running, and how to fix it when it breaks. And of course, you can now say...I use Arch btw!